Ethernet Connection
Connecting the ECU
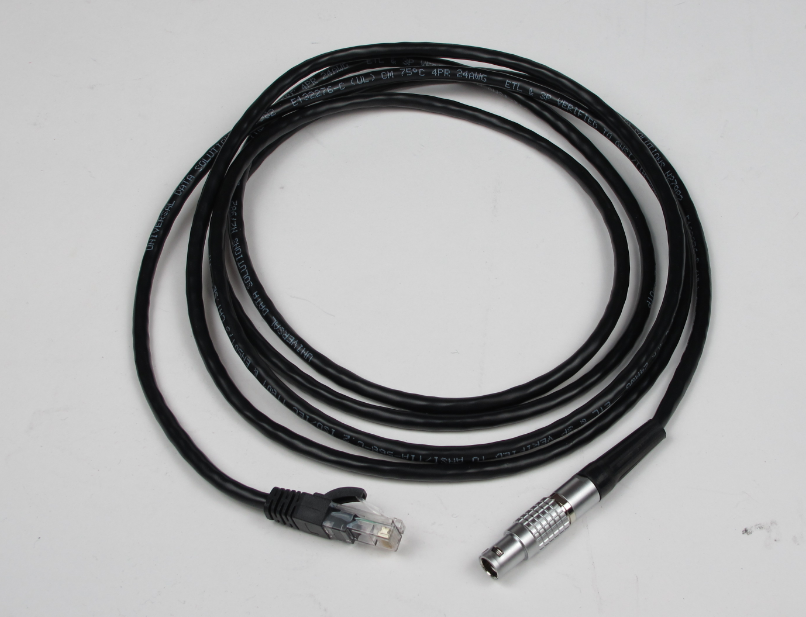
Communication Cable
The Emtron proprietary communication cable translates standard high speed Ethernet to a Lemo connector that feeds directly into the ECU header.
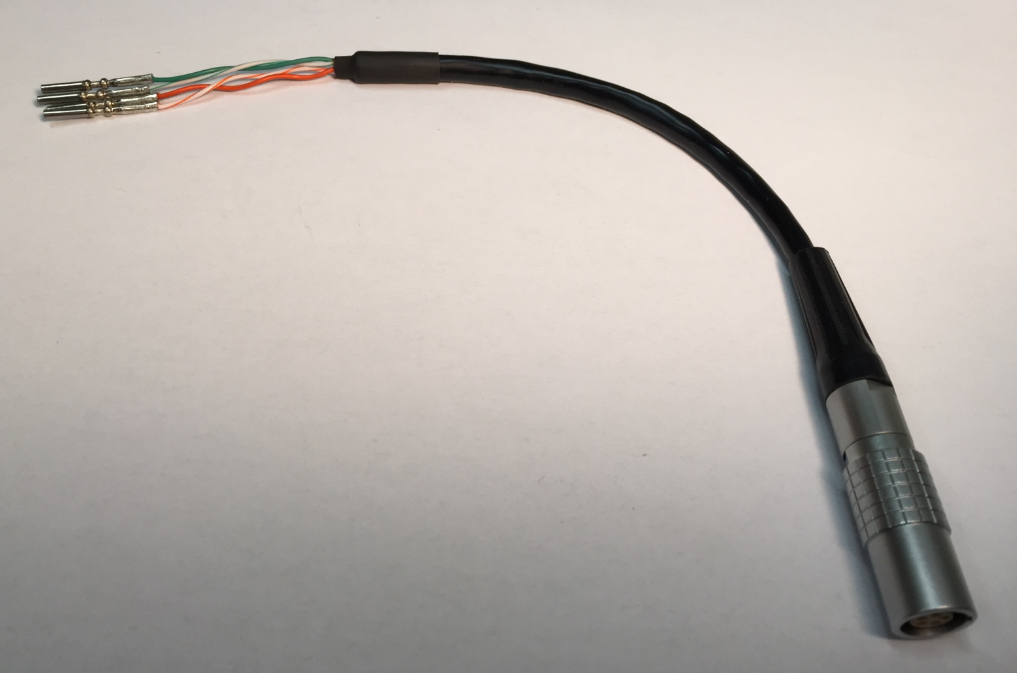
The pin configuration for the Lemo receiver is as follows.
SL series
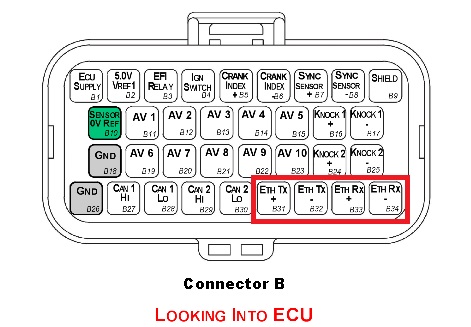
| Wire | SL Pin |
|---|---|
| Green/White | B31 (TX+) |
| Green | B32 (TX-) |
| Orange/White | B33 (RX+) |
| Orange | B34 (RX-) |
KV series
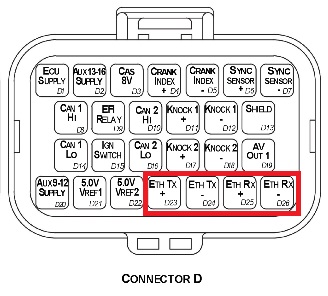
| Wire | SL Pin |
|---|---|
| Green/White | D23 (TX+) |
| Green | D24 (TX-) |
| Orange/White | D25 (RX+) |
| Orange | D26 (RX-) |
IP Config
The Emtune software will communicate to the ECU over a static IP address.
Set your IP and subnet to the following on the Ethernet port you will be using on your PC.
IP: 192.168.1.50
Subnet: 255.255.255.0
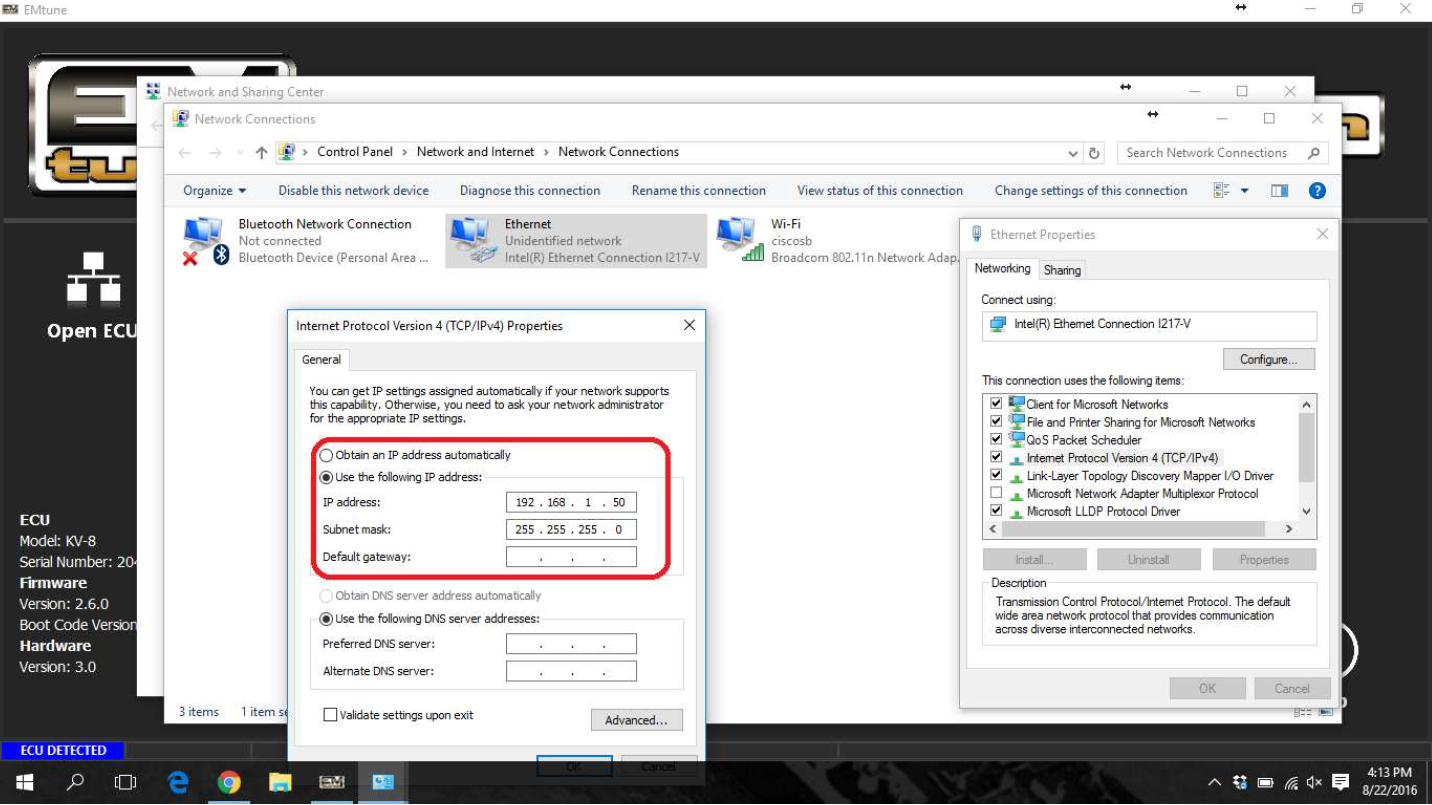
With successful connection, the Emtune Welcome screen will display “ECU DETECTED” in blue in the bottom left corner as can be observed in the background in the above example.
For detailed IP Configuration info click here: IP Configuration