Logging
Logging
Software Navigation
From the Welcome Screen, you can Open Log directly from there. This will open the software in a limited viewing mode where the logging view is only available.
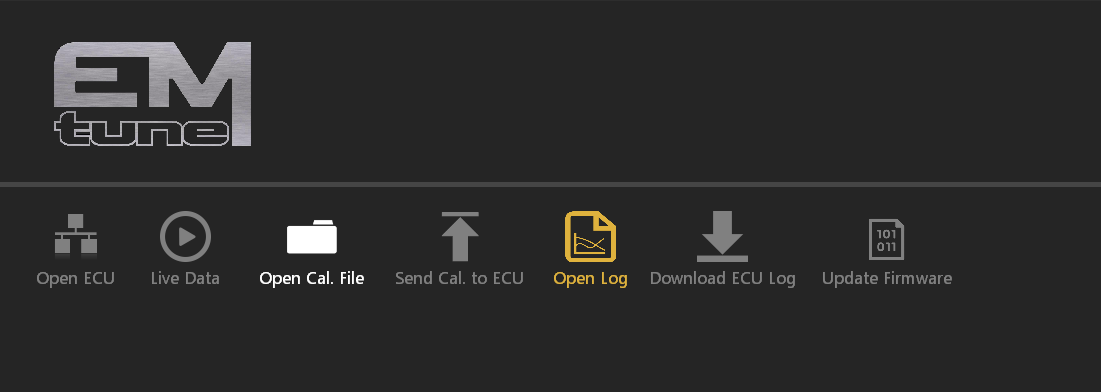
Otherwise, when the ECU, or a calibration file is open, navigating over to the Logging tab at the top will put you into the Logging section.
From here, you can navigate through a number of menus, tabs, sub tabs, etc.
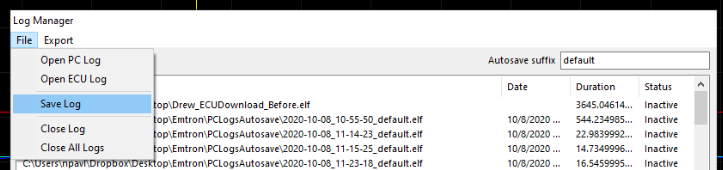
Opening a log file
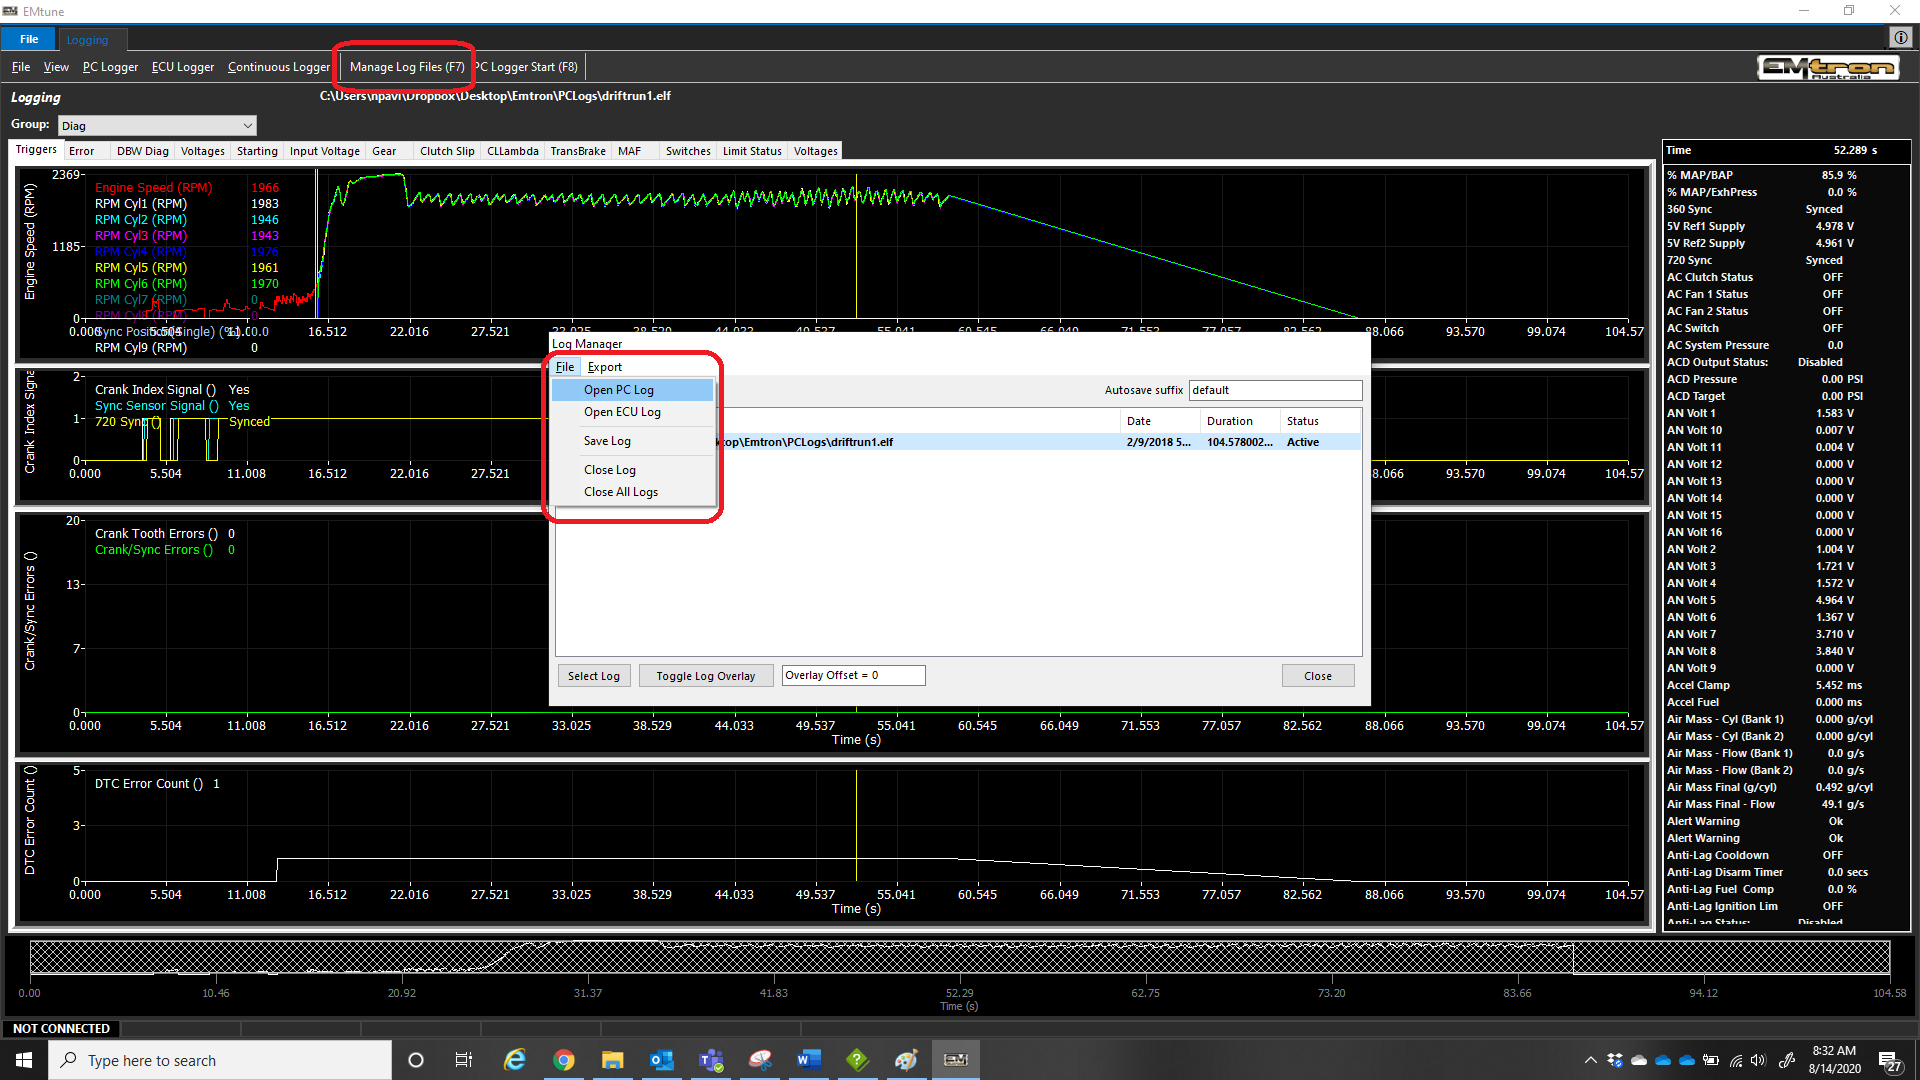
Select “Manage Log Files” or press hotkey (F7)
Use the file menu to open PC/ECU Log file (".elf" files) and they will populate the log manager list so you can easily switch between log files
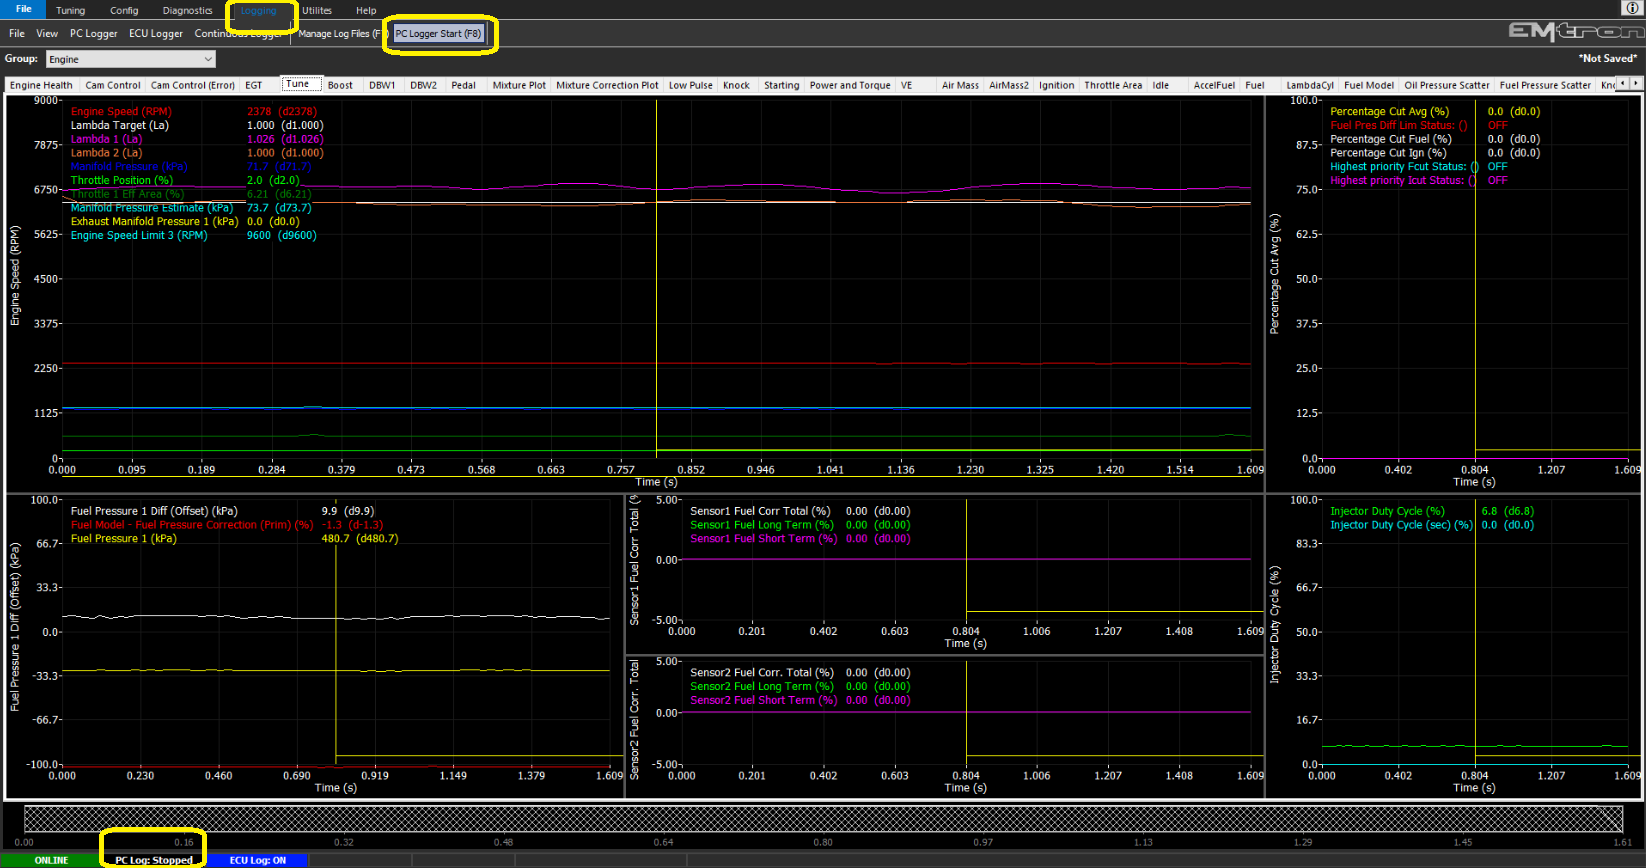
PC Logging
PC logging allows the ECU to record all channels available with the PC (at medium rates). The PC logger is a very powerful tool for this reason, as it can diagnose many issues. Technical support will almost certainly request a “PC Log” for most inquiries.
Starting and stopping a PC log is done either in logging tab by clicking “PC Logger Start (F8)”, or just by simply pressing “F8” key on the PC. Logging will confirm recording has begun on the bottom left with a Blue confirmation

** All PC logs will auto save to your hard drive under the specified paths (File -> Options)
When stopping the PC log, the ECU will direct you into the logging view (can be turned off - set ON by default)
Saving a log file
Select “Manage Log Files” or press hotkey (F7)
Use the file menu to save PC/ECU Log file (".elf" files) and they will populate the log manager list so you can easily switch between log files
** Double click the log file you want to save in a new location
* PC Logs will auto save to your hard drive under the specified paths (File -> Options)
Overlaying a log file
With two or more log files in the log manager, Select the second log file and click “Toggle Log Overlay”
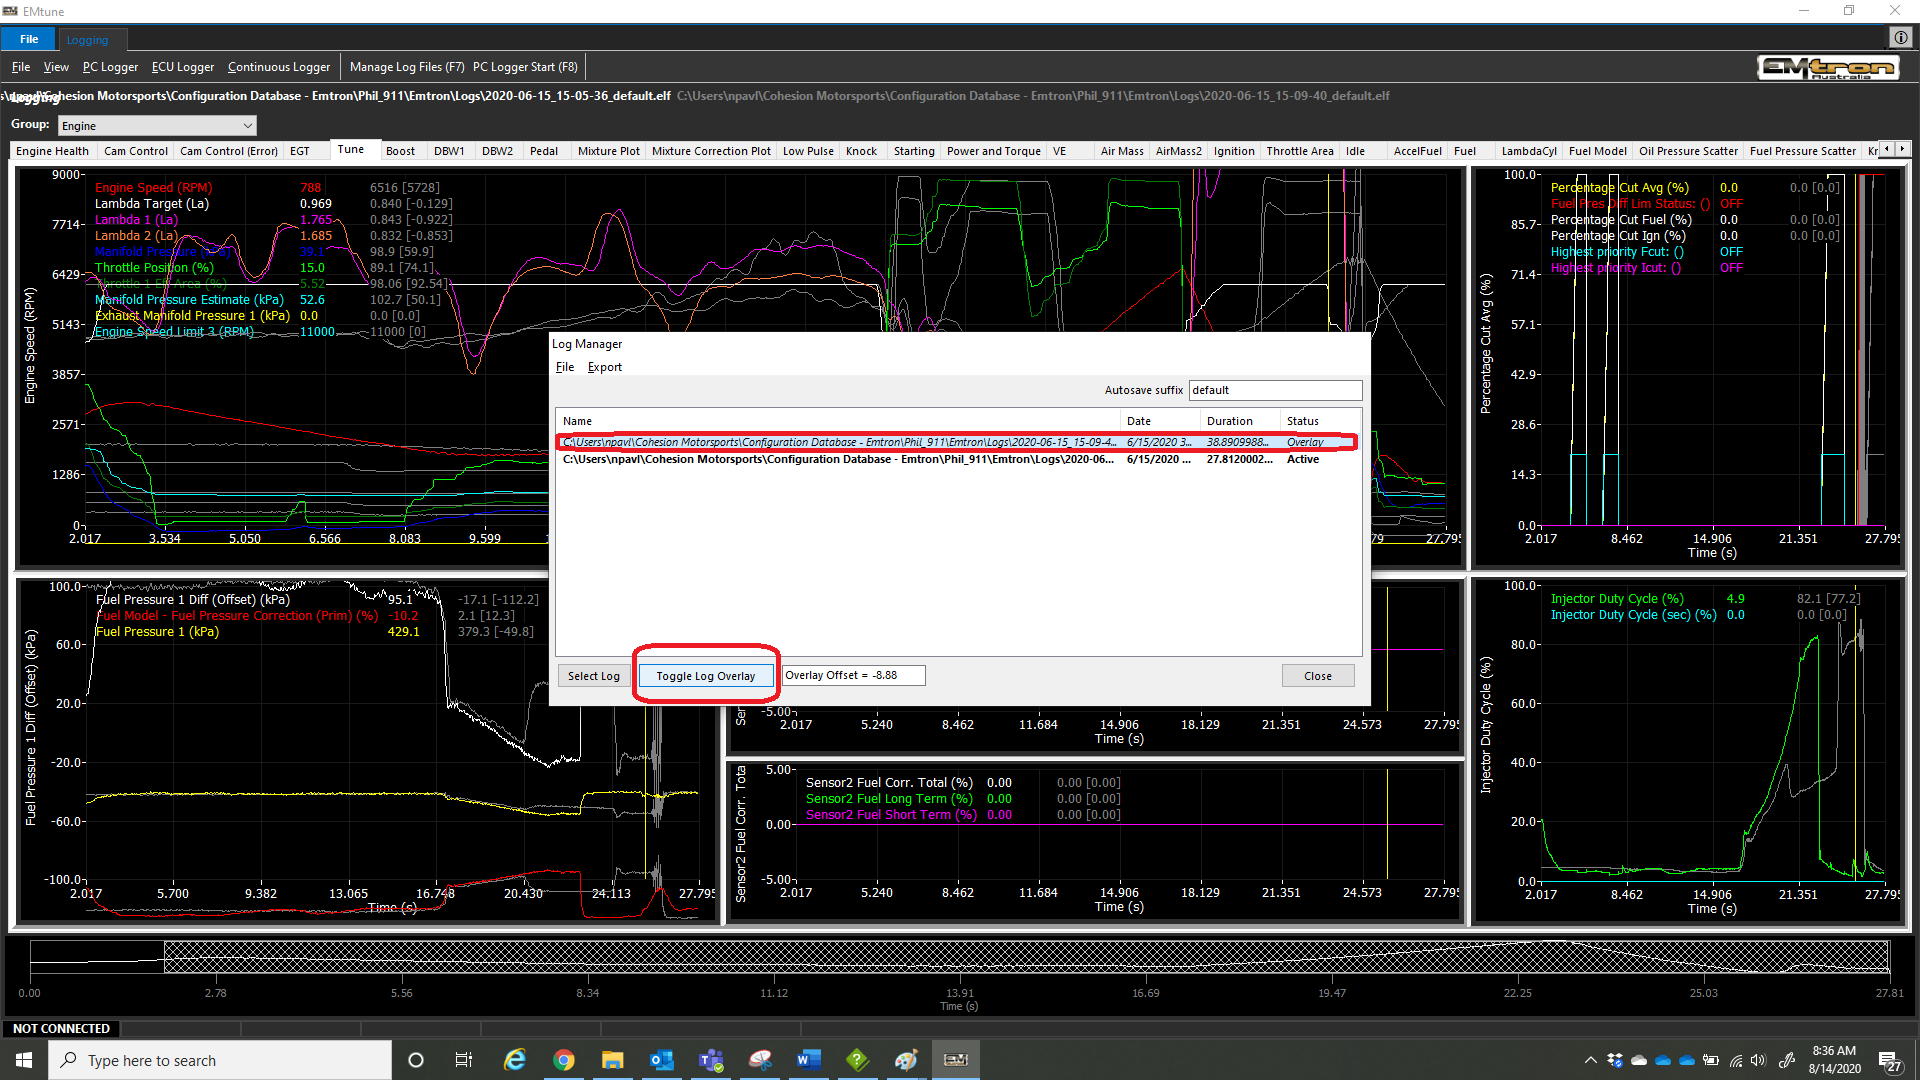
The overlay offset can be entered in, however inside the logger once the Log Manager is closed, hot keys can be used to shift the log view around
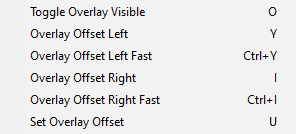
** Right Clicking the logging area will show all hot keys available
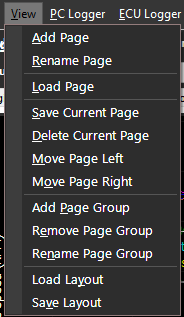
Managing groups, pages, and complete layout
Under the “View” tab, all management of the logging layout can be configured. Each logging page can be individually exported and saved, as well as the complete layout
** It is highly recommended that users back up their logging layout periodically
** New Emtune version installations will ask you to overwrite the logging layout
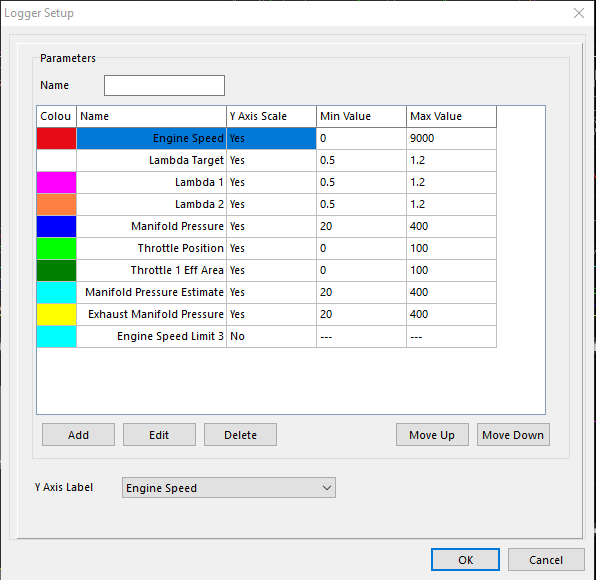
Setting up Graphs
Right clicking in the page, then clicking Setup Graphs brings up the menu choices to choose channels for line graphs.
Choose your channels, min/max scales for each channel, what channel ultimately you want on your Y-Axis label
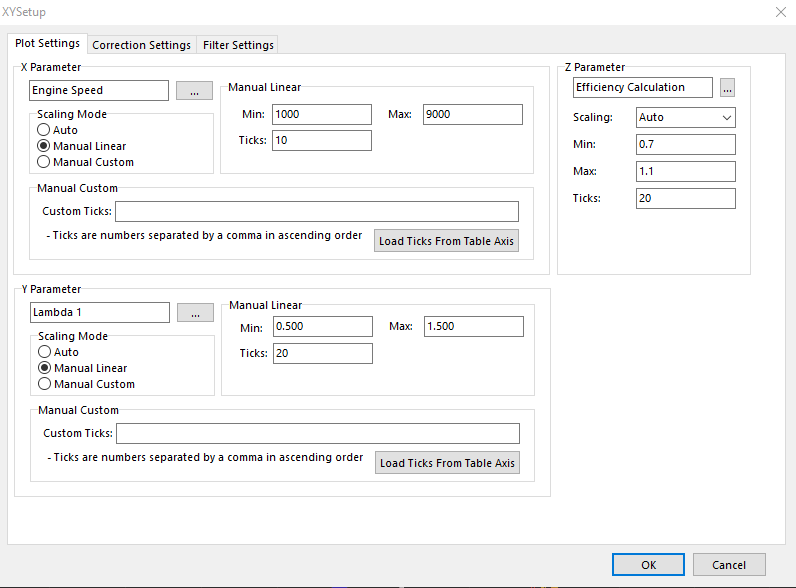
Setting up XY Plot
XY Plots have similar settings. Set up X and Y channels. Z channel will be the color channel for the dot plot to populate.
There are also correction and filter settings that can further customize the XY Plot
** XY Plot Correction is covered in a different section